
I took an old bookshelf that had seen better days and totally transformed it with a little metallic paint and some peel and stick wall paper. It went from taking up space in the bathroom to a beautifully functional bookshelf in my office. Keep reading to see how I did this major bookshelf makeover.
This post contains affiliate links and if you buy a product I will earn a small commission at no additional cost to you. Thank you for supporting Mom Can Do Anything.
PART ONE: PAINTING THE BOOKSHELF
STEP ONE: PREPARE YOUR PAINT
I used MODERN MASTERS METALLIC PAINT. If you are using metallic paint in particular, you don’t really want to shake it vigorously and add a bunch of air to the paint, so try turning it upside down for a while before you are ready to paint. This will allow the pigments that are probably stuck to the bottom to come to the top and when you are ready to paint, they will mix in naturally when you turn the paint back over. If your first coat of paint comes out looking like this, you haven’t mixed your paint properly.

STEP TWO: PREPARE YOUR BOOKSHELF
Lay down a drop cloth and set your bookshelf up off the floor. I used two slats of wood to prop it up on.
STEP THREE: SAND THE SURFACE
I always sand anything I paint. It just allows the paint to stick to the surface a lot easier. It’s even something your kids can help with. After so many days of begging for something to do, they were happy to help.

STEP FOUR: PRIME THE SURFACE

We did two coats of primer with drying time in between coats because the wood was so dark. The kids also volunteered for this job and since it was just primer, I let them go for it. They really only did the first coat. I was able to go over their work with the second coat and smooth it out, but all in all, they did okay.
STEP FIVE: PAINT YOUR BOOKSHELF

We removed the shelves that we could and painted them separately, both sides. We painted two coats of Modern Masters Venetian Blue (Opaque) metallic paint. Let me say I fell in love with this paint the moment I saw it. I had no clue what I was going to paint when I bought it, but I knew I would love it. It’s gorgeous in real life. I cannot say enough about this color.
STEP SIX: COAT WITH POLYURETHANE
When you are using metallic paint, it’s important to coat it with polyurethane to protect the paint’s surface. I used two coats of polyurethane. It’s important to let it dry in between coats. Modern Masters does have it’s own top coat, but I already had a can of polyurethane, so I used that.
STEP SEVEN: REMOVE FROM PROPS

Cut your bookshelf away from your wooden props. I went around the bottom edge of the bookshelf where paint had gotten on the wooden boards underneath the bookshelf. This was just to make sure I didn’t peel off any paint when I removed the bookshelf from the wood boards.
PART TWO: APPLYING PEEL & STICK WALLPAPER
This is where I have a tendency to make things harder than they have to be. Don’t over think it. I’m sure you already know that you hang wallpaper from top to bottom. Don’t try and go side to side like I did. Keep it simple and do what you know.
STEP ONE: MEASURE EACH WALL OR SECTION
I found it easiest to go one section at a time. Once I learned my lessons about not going from side to side, I decided to go straight down the middle of the back. Then I measured and cut strips to put on either side.
STEP TWO: CUT EACH PIECE OF WALLPAPER

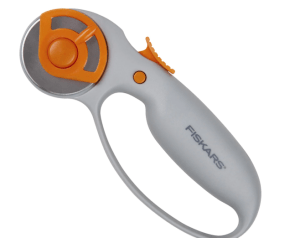
Cut each piece on a cutting mat with a straight edge. Here is another lesson I learned. It pays to be exact here. If you have a cutting mat, I would definitely use it. I got my cutting mat and rotary cutter at Michaels. It is much easier to cut a piece to the exact size you need and apply it than it is to estimate or try to cut it while you are installing it. Measure the piece you need. I gave myself about an 1/8th of an inch for overlap, but it went so much easier when I finally did this.
STEP THREE: APPLY THE WALLPAPER TO THE BOOKSHELF
Again, go from top to bottom. Start by peeling back a small portion of the backing at the top of your piece, lining it up straight where you want to stick it and slowly peeling the back off while smoothing the top down. On some of the smaller pieces, I found it was just as easy to peel the back off first before I applied it, but be careful of this technique with larger pieces. You don’t want the piece sticking to itself or another part of the shelf before you get it in place. I used Devine Color Prints and Patterns Peel and Stick, Removable Wall and Surface Covering, Speckled Dot Black and I bought it at Target.
Here is before and after.


Here is another furniture makeover I painted with metallic paint. It looks great. You can also see the office chairs I reupholstered and spray painted to go with this bookshelf here.


Pin Metallic Paint + Peel & Stick Wall Paper = Major Bookshelf Makeover here!


[…] Click Here To See How To Paint Your Outdoor Cushions Click Here To See How I Transformed This Secretary Click Here To See My Struggle With This Office Credenza Click Here To See How To Paint On Laminate Furniture Click Here To Get Fancy With Metallic Paint & Wallpaper […]