
When I started planning my spring tree, I knew I wanted to use butterflies; but, when I started shopping around for butterflies, I found some really cute mushrooms. So, I decided I wanted to include mushrooms as well. I loved the cute little moss mushrooms I had found, but the scale wasn’t quite right. I wanted something a little bit larger to make an impact in my tree and serve as my focal points.


Mushroom Materials
Luckily, I found this craft foam and to me at screamed mushrooms. I bought what was available which was 3 half balls plus one large cone. I carved the cone into three pieces and used those as my stems. The half balls were obviously my mushroom tops. I secured the tops to the stems with a floral stem that I later hot glued in place.

After debating on whether to cover these new mushrooms in moss like the smaller ones I had found or to paint them fun colors, I ultimately decided to paint them. I saw this as an opportunity to add more pops of color into my tree. I also considered covering them in fabric which would have been fun, but I went with the supplies I had on hand.

Painting The Mushrooms
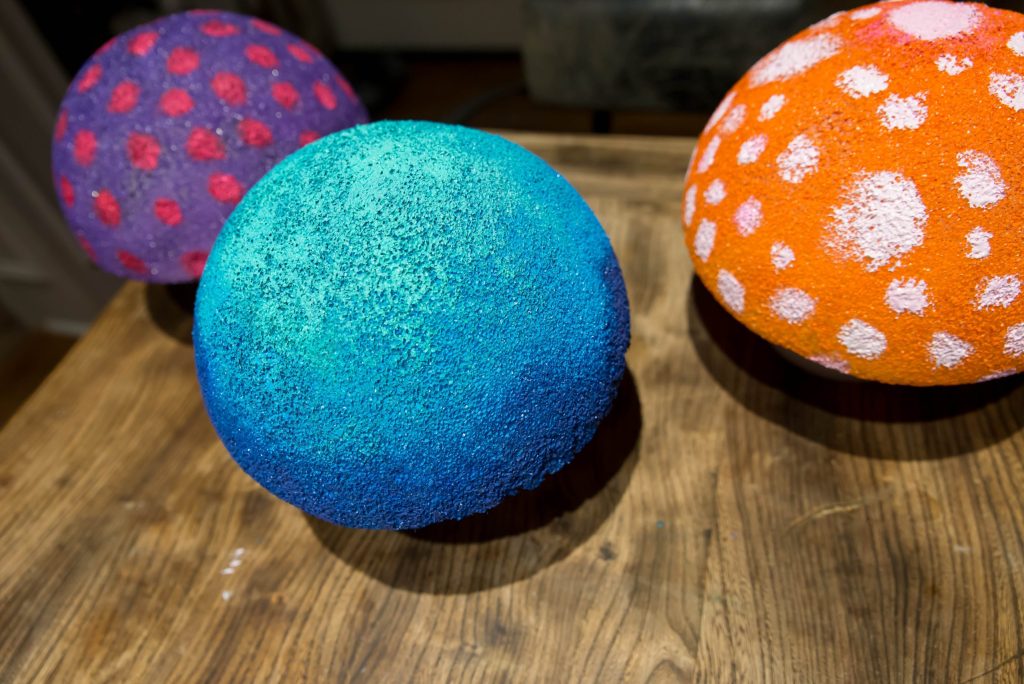
My daughter and I started to paint with craft paint on this foam on the tops of our mushrooms and discovered that it was going to take entirely too much paint and it was very hard to spread paint on this craft foam. Next, we decided to try spray paint which worked a whole lot better. I just wanted to spray pain the tops of the mushroom and leave the stems white, so I removed the tops from the stem and just sprayed them. We painted all three tops of our mushrooms three different colors – purple, blue, and orange. We spray-painted both sides of our mushroom tops.

When the spray paint was dry, we went back with our craft paint and painted polk-a-dots on two of the mushrooms. We went with light pink dots on top of the orange mushroom, and then we used brighter pink dots on top of the purple mushroom top. We painted some detail and shading around the bottom edge of the blue mushroom with dark blue paint, and then a highlight with some light blue paint on the very top.
Once all of our paint was dry, I went back with a hot glue gun and secured the stems to the tops with the stick and hot glue. I used a little hot glue in the hole with the wooden stem and then around the edge of the foam stem to hold it all together. This was easy and has worked perfectly.

Attaching Mushroom to My Spring Tree
Finally, in order to attach them to the tree I used wire around the top of the stem and at the base of the mushroom. Then, I was able to attach them to the tree with that piece of wire. I placed them towards the front in a zig zag pattern.

I love how these mushrooms turned out. The scale was great and three mushrooms were perfect for my 6 1/2 foot tree. I was also happy that we painted these mushrooms because they definitely added a pop of color and pattern to my spring tree.

Mushroom Supply List
These mushrooms were super easy to make. All you need is craft foam – three half balls, and a cone – a little hot glue, a floral pack, and some paint.
3 Half Balls of Craft Foam – #10 Half Ball, 4.7 in. x 9.6 in.
1 Large Cone of Craft Foam – #24 Cone, 5.75 in. x 24 in.
About Mom Can Do Anything
My name is Tara and I blog here about my home, my life, Christmas and all things in between. Thank you for stopping by MomCanDoAnything.com! Over the last seven years, I’ve documented my passion for home improvement projects and DIYs, sharing valuable insights and inspiration for transforming living spaces.
My true love lies in seasonal decor, especially Christmas, and I delve deep into tips and tricks to make your festivities truly magical. Don’t miss out on the chance to explore my brand new retail site at ww.HolidayHangups.com and my Etsy site, Holiday Hangups, where you’ll find an exquisite collection of Christmas decor to adorn your home.
Beyond that, my blog also features an array of lifestyle posts, covering school projects, delightful recipes, heartwarming family conversations, captivating photography, and unforgettable travel experiences. I invite you to dive into my other articles and discover the joy of creating a cozy and enchanting life. Happy reading and don’t forget to spread the cheer!
Similar Posts
Pin My Large DIY Mushrooms Here

SHOP THIS POST HERE
SHOP THIS POST ON BENABLE


[…] you want to see more of my Mushroom and Butterfly tree, check out how I made those DIY mushrooms at My Large DIY Mushrooms and read my full post at Mushroom and Butterfly […]