
If you are like me and you love to decorate with pumpkins in the fall, but before you even get to Halloween, your decorative pumpkins have already started to rot on the dining room table, then let’s talk ways to make them last longer. When you spend money on pumpkins, you want them to last through the season, here are some ways that I have found to preserve pumpkins for decoration.


Every year we go to this little pumpkin patch at my son’s old school and pick out pumpkins. We always get a giant one to carve and several others to sit around the house or to paint or craft with. Well, they always end up rotting, some sooner than others. So, this year I started wondering if there was anything I could do to preserve pumpkins to make them last longer.
How To Preserve Uncarved Pumpkins for Decorating: Pick a Good One
I googled and searched and saw several methods and suggestions. The first was to basically use common sense when picking out your pumpkins. You know, don’t pick one that’s probably already starting to rot. Try to get one with a stem. Look for soft spots and don’t pick one that has soft spots. Well, try telling that to my kids. We pick our pumpkins based purely on whether we have a connection with them. Is this pumpkin speaking to me in some way? Really, we might be more pumpkin rescue than pumpkin picking.
How To Keep Pumpkins From Rotting
The other methods included things like coating them with petroleum jelly, or floor wax, which I considered. But, the suggestion that seemed to be the best was to dunk your pumpkins in a bleach bath. The bleach kills any mold or fungus that might grow and cause the pumpkins to rot.
Tips If You Have Pets
Since, I’ll display these pumpkins on my dinning room table and I have four cats that like to hang out in the dinning room, I looked up whether or not bleach would harm my cats. Yes, that is a thing. Bleach can harm your pets, but I think the danger is when you are actually doing your pumpkin bleach bath. I was careful not to leave my sink filled with bleach water unattended. You could also do this in a bucket, but I also have dogs. If you do use a bucket, please be careful not to let your dog have access.
How To Preserve Uncarved Pumpkins for Decoration
Step 1: Fill Your Sink with Water
First, I just filled my kitchen sink about 3/4 of the way with water. I left some room for the pumpkins.
Step 2: Add Bleach
I poured in about three short pours of bleach. The ratio is probably something like two tablespoons to a gallon of water. The bleach is pretty diluted.
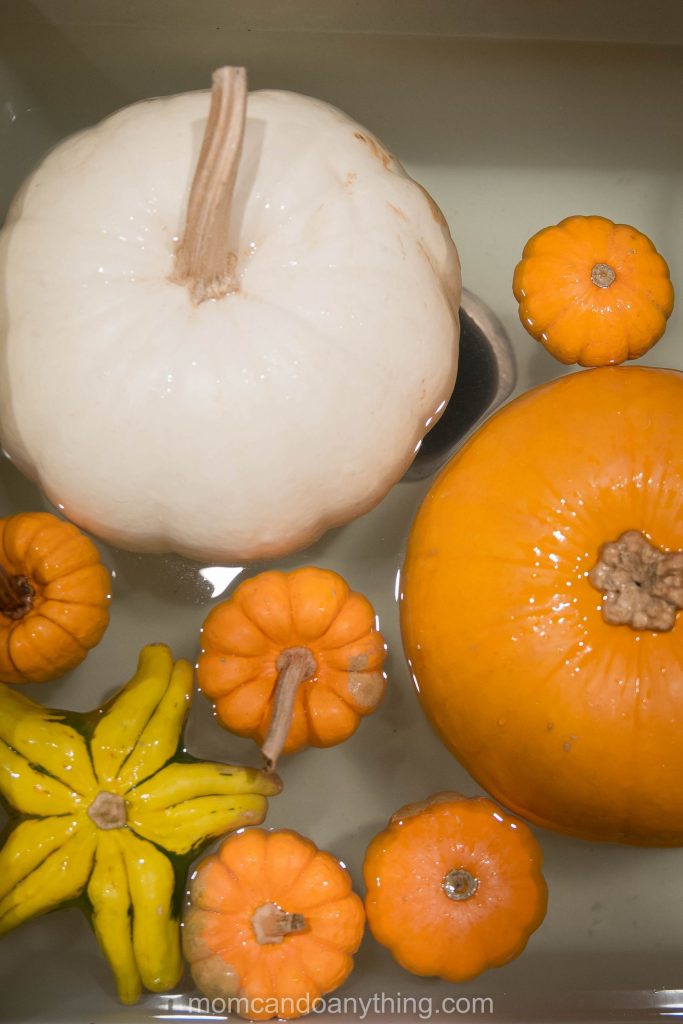
Step 3: Add Pumpkins
Next, I just dunked some pumpkins in the water. I turned them over and let them sit for a few minutes. I wiped them down when they were in the water with a paper towel to get any dirt or mold off of them.


Step 4: Dry Your Pumpkins
Then, I got them out of the sink and placed them on towels on the kitchen counter. I dried them off with paper towels and drained my sink. Then, I let them sit so they could dry off completely before putting them on my dinning room table. I definitely don’t want to decorate with wet pumpkins.
Step 5: Decorate With Your Pumpkins
When they were all dry, I added my newly bleached decorative uncarved pumpkins to the dinning room table. I always place them on top of something like a tray, a runner, a place mat, or this year, a cutting block. This way if they do start to rot and I don’t catch it right away, they won’t rot directly on my table.

I love the look of uncarved pumpkins for decorations in the fall. They also look great on the front porch! I would also go to the trouble of giving my pumpkins a bleach bath to keep them from rotting on the porch and to help them last longer outside. These pumpkins looked great against my newly painted front door. Check out how I painted my front door to look bigger here and how I was able to paint my front door know without removing it here.

Sometimes if you really get lucky, pick great pumpkins, and give them a good bleach bath, they might last into Christmas. Check out my live Christmas tree display I put in my backyard with the uncarved decorative pumpkins I preserved for decorating.

If you love decorating with pumpkins, you might also like decorating with gourds. Check out this article about how to dry out gourds and use them for decoration. Then check out this article about all the crafting possibilities with gourds.
About Mom Can Do Anything
My name is Tara and I blog here about my home, my life, Christmas and all things in between. Thank you for stopping by MomCanDoAnything.com! Over the last seven years, I’ve documented my passion for home improvement projects and DIYs, sharing valuable insights and inspiration for transforming living spaces.
My true love lies in seasonal decor, especially Christmas, and I delve deep into tips and tricks to make your festivities truly magical. Don’t miss out on the chance to explore my brand new retail site at ww.HolidayHangups.com and my Etsy site, Holiday Hangups, where you’ll find an exquisite collection of Christmas decor to adorn your home.
Beyond that, my blog also features an array of lifestyle posts, covering school projects, delightful recipes, heartwarming family conversations, captivating photography, and unforgettable travel experiences. I invite you to dive into my other articles and discover the joy of creating a cozy and enchanting life. Happy reading and don’t forget to spread the cheer!
Pin How To Preserve Pumpkins for Decoration Here!

Shop How To Preserve Uncarved Pumpkins for Decorating
Shop BENABLE Here
Benable is a tool to create shareable lists of things you recommend! You can skip the waitlist and create your own shareable lists by signing up using my invite link: https://benable.com/i/PEPF6


[…] For additional inspiration, discover our fun pumpkin painting and decorating ideas that will further enhance your seasonal decor. Speaking of pumpkins, if you want to make them last longer as well, check out my easy trick in How To Preserve Pumpkins So They Last Longer. […]