
Well, this was a first for me – designing a t-shirt for my kindergartener’s 100th day of school. Apparently, it has become all the rage. The assignment was to put 100 items on a shirt and t-shirt paint was a suggested medium. We worked hard on our shirt, but we certainly weren’t the only ones. There were so many cute 100 days of school shirt designs at my son’s school. Those kiddos’ families were super creative. Keep reading to see how my son and I put together this Star Wars 100 days of school t-shirt idea.

STEP ONE: GET INSPIRATION
We looked on Pinterest to get our creative juices flowing. My son, of course, picked light sabers. He’s a huge Star Wars fan and I thought the light sabers would be easy for him to draw. I wanted him to participate in making this shirt as much as possible, so I let him pick the theme.
STEP TWO: GATHER YOUR MATERIALS
We started with a trip to Michael’s where we got a t-shirt, and t-shirt paint pens that I did not even know existed. We bought and used one yellow, two silver, one blue, and one red t-shirt paint pen and used them all. Also, we used a printable iron on paper for the front of the shirt. All of these supplies are also available on Amazon as well, but sometimes it’s nice to shop in person.

STEP THREE: DESIGN THE FRONT OF THE SHIRT
We used a printable iron-on.
I liked the idea of adding lettering and a saying about 100 days. After, I considered how I would do my lettering, I basically thought I would just end up messing up the shirt. So, I turned to my stash of iron on fabric. I had two sheets left. This is an iron on fabric that you can just put in your printer and print a photo or anything else you would like onto the fabric, then you can iron it on your shirt. These I ordered some time ago on Amazon, but you can also find them at Michaels. I’ve linked to both below.
Here is my bonus Photoshop trick.
I designed my iron on using a photo from my recent Darth Vader photo shoot that you can see here. I added the text “100 Days Smarter He Is” under the photo and taught myself a new Photoshop trick. After I added the text, I converted it to a shape and then selected perspective. Then I was able to pull the bottom of the text to make it look like the text does in the opening of all the Star Wars movies. I thought this was a nice touch and I love learning a new trick.

After printing my new photo onto the iron on paper, I ironed it to the front of the shirt. I used the full 8 1/2 x 11 sheet and I probably should have made it smaller. It was kind of stiff for him to wear, but it was only for one day and it added so much to the shirt. He was the only one in the school with a photo of himself on his shirt.
STEP FOUR: DESIGN THE BACK OF THE SHIRT
Jersey Numbers
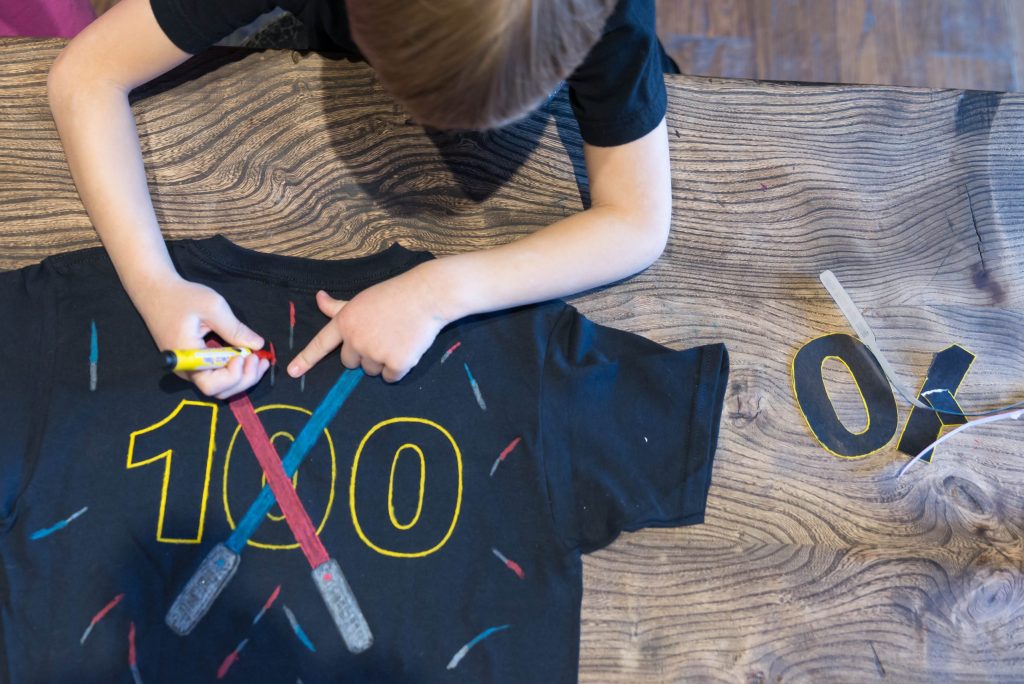
Then we designed the back of our shirt. I liked the idea of using 100 like a number on the back of a jersey; so, I used some large number stickers on the back of the shirt as a pattern. Next, I added two light sabers going through the numbers. I drew two light sabers on paper and cut them out to add to my pattern. Then, I taped them to the shirt and the numbers. Once I had everything in place, I traced around my pattern with a yellow t-shirt paint pen. When that was dry, I took the light saber patterns off and colored them in with my silver, red and blue, pens. This took a few coats with the pens. At first I wasn’t sure the silver was going to show up, but after the first coat dried, the second coat looked much brighter.

100 Light Sabers for 100 Days of School
At this point, I let the kids jump in. They were dying to help. I showed them how to draw a light saber and they went to work, drawing 100 light sabers. They did wear themselves out and I went back over their work making the light sabers slightly bigger. We did silver handles with some red light sabers and blue light sabers. I let them put them on the front, the back, the sleeves, just where ever they wanted to draw a light saber. This actually probably helped me quite a bit. If they hadn’t just jumped in and randomly placed light sabers, I’d probably still be analyzing and over-thinking their placement.


After we wore the shirt, we just hung it in the closet. I can’t imagine that it would withstand a washing. The paint might stay on, but I think the iron on would need to be sewed on around the edges. I haven’t ever tried to wash an iron on, so I don’t know how it would turn out.


This was such a fun project to do with my kids. If you have a kid in pre-school or kindergarten, chances are you’ll be doing a similar project around January or February. So, save this idea if you also have a young Star Wars fan in the house.


About Mom Can Do Anything
My name is Tara and I blog here about my home, my life, Christmas and all things in between. Thank you for stopping by MomCanDoAnything.com! Over the last seven years, I’ve documented my passion for home improvement projects and DIYs, sharing valuable insights and inspiration for transforming living spaces.
My true love lies in seasonal decor, especially Christmas, and I delve deep into tips and tricks to make your festivities truly magical. Don’t miss out on the chance to explore my brand new retail site at ww.HolidayHangups.com and my Etsy site, Holiday Hangups, where you’ll find an exquisite collection of Christmas decor to adorn your home.
Beyond that, my blog also features an array of lifestyle posts, covering school projects, delightful recipes, heartwarming family conversations, captivating photography, and unforgettable travel experiences. I invite you to dive into my other articles and discover the joy of creating a cozy and enchanting life. Happy reading and don’t forget to spread the cheer!
Similar Posts
Star Student Poster Idea Featuring Darth Vader
The Best Valentine Cards for Kids
Crafts for Kids: Handmade Cards
School Project: Clay Native American Pueblos Diorama
Pin 100 Days of School T-Shirt Idea here!

Shop 100 Days of School T-Shirt Idea Here
Shop BENABLE Here
Benable is a tool to create shareable lists of things you recommend! You can skip the waitlist and create your own shareable lists by signing up using my invite link: https://benable.com/i/PEPF6


What is the font you used for the tshirt? I’m trying hard to make one on PowerPoint before Tuesday.
I don’t recall. I’m so sorry. It looks like it could be Impact with a yellow stroke around it. Good luck with your shirt!
I love the 100 days tshirt. If I send you a photo of my son with his Jedi costume holding his light saber, would you be able to make this same shirt for him? He wouldn’t need the back done if it’s too time consuming. He’s about 30 days off his 100 day mark and today is Jan 10