
My daughter is coming up on her teen years and it was time for a little bedroom refresh – an official teen girl bedroom. So, she and I spent her spring break updating and making her room more age appropriate. We had so much fun spending time together and creating this cozy space for her.
This post contains affiliate links. If you click on a link and make a purchase, I may earn a small commission at no additional cost to you.
Girl Bedroom Project 1: Feature Wall
She had picked out a blue color for one of her walls when she moved in to that room about 6 years ago and she wanted to keep that wall. In addition to the blue color, she has a beigy neutral color on the rest of her walls that was holding up pretty well. So, we decided not to do a full paint job. Instead, we added a stencil to the blue wall. We used this opportunity to bring in another color and make our feature wall even better. I have a post on the details of what it’s like to stencil a wall here – How To Stencil A Wall.

Girl Bedroom Project 2: Updated Canopy Bed
We also had curtains and bedding we wanted to keep, so those were our starting points. The bedding was a quilt made by my mom for her and it is extremely colorful, which is what my daughter loves. So, we started by picking colors from that fabric. She basically picked out a rainbow. Nothing was really off limits with this girl as far as color goes.
Our first trip to collect supplies was to the fabric store to look for a curtain for the canopy bed. Her bed is a canopy bed, but we hadn’t had the canopy on it in 6 years. She decided to put it back up and we picked out a fun purple fabric to drape over it. This really adds more color and pop to our feature wall. It also provides some privacy and blocks the light from her very large window. She is loving it.


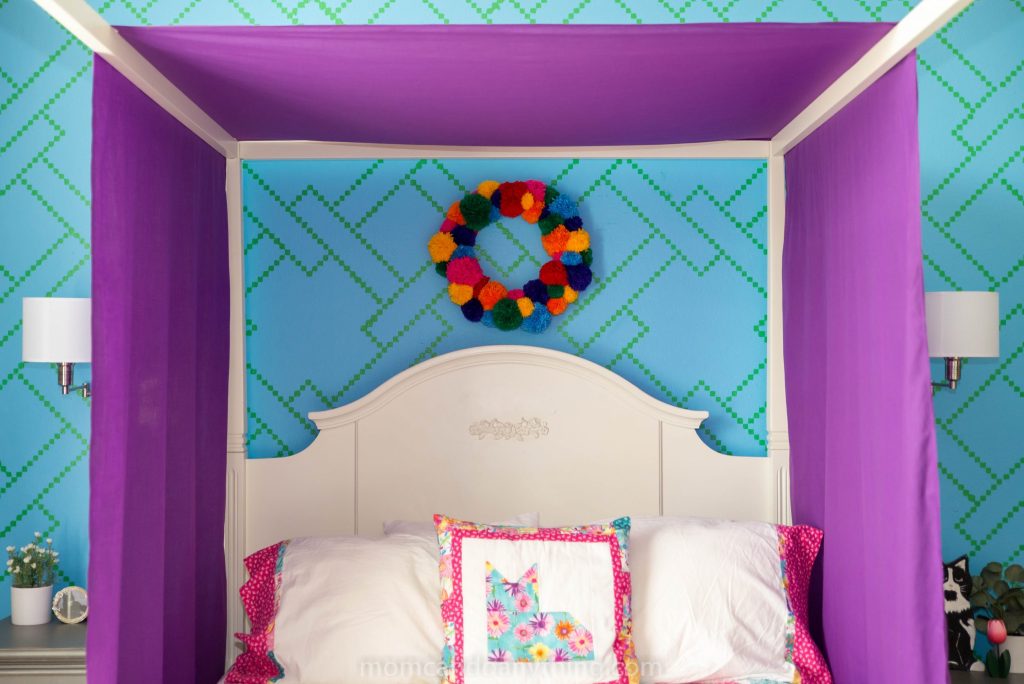
We also added some multicolor lights around the canopy that really add to the ambiance. This is her favorite reading spot now!
Girl Bedroom Project 3: Painted Nightstand
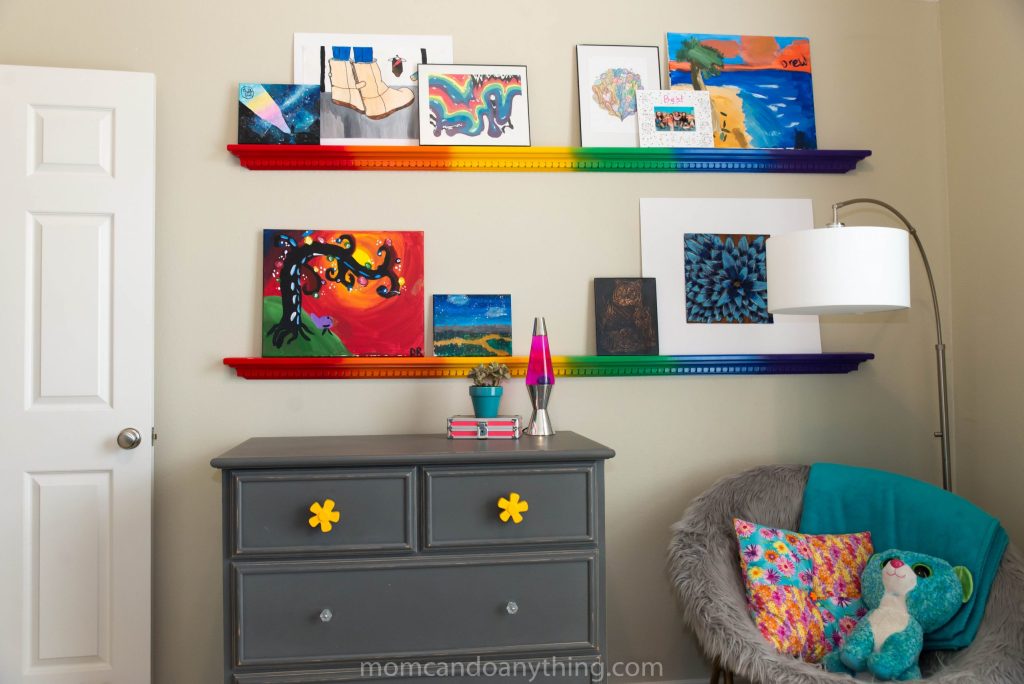
She has a gray nightstand and matching dresser, but she also had a nightstand that she inherited from me that was not gray. In order to make the room more cohesive and add some symmetry to the feature wall, we paint matched the gray nightstand. This was super easy. We just took the leg off the gray nightstand and had Home Depot whip us up a batch of gray paint to match. We cleaned the nightstand, sanded some areas, used liquid sander on the rest, and painted it with two coats of paint. We also updated the drawer handle and some drawer pulls on the gray nightstand and the dresser by spray painting them all yellow to match each other.

Girl Bedroom Project 4: Rainbow Shelves
Over the years she has learned a lot about who she is as a person and she was attempting to display her personality on her walls with her artwork and gymnastics medals. It was looking a little unorganized, so we made specific spots for her to display her various collections. We, started with these picture ledge shelves that my dad and I made about 15 years ago. They were in the attic, but we put them to use and had a ton of fun painting them like a rainbow. I even learned how to mount these shelves with adjustable flush mounts. Now, this is the perfect wall for her to display all of her artwork. Check out Rainbow Spray Painted Shelves for all the details on this project.

Girl Bedroom Project 5: Harry Potter Display
A few years ago, she read and fell in love with Harry Potter. She was even displaying the books under her window. She also had some artwork that she had done, some Harry Potter Legos, and a wand collection. So, we put this all together on some floating shelves over her bookshelf. We used some sticky wall paper from Target to make a wand display area and we even added a puck light to light her artwork. This might be my favorite part. I don’t know, it’s so hard to decide.


Girl Bedroom Project 6: Updated Lighting
Speaking of puck lights…we also used those in the sconces we added on either side of her bed. This is a trick I saw on Instagram. (Sorry, I can’t remember where I saw this from first.) If you want a sconce and don’t want to hard wire it in the wall or don’t have an outlet close by, you can just remove the plug in wire and glue in puck lights that work with a remote. We left the wire in case we wanted to later add a light bulb and plug them in, but tried the puck the light trick. Honestly, the puck lights are fun because they can change colors and you can use the remote, but they aren’t bright enough for her to read with. We are going to add actual lightbulbs.


We chose sconces that had a swing arm and placed them close enough to the bed so that she can swing them inside her curtain area when she is reading. It was her idea to swing them over the bed. I thought this was a brilliant idea. She also loves that she has more table top space on her nightstands since she doesn’t have a lamp sitting there. These sconces are from Home Depot and easy to install.

We also upgraded her floor lamp situation with an arching lamp over her round chair. This is another reading area or crafting area. I may add a little craft cart I have my eye on for her in this area. This lamp is from Target and it is the perfect modern touch for this space. The chair is from Pottery Barn and I have linked it here.


Medal Display, Bulletin Board & Memory Boxes
I mentioned before that she was attempting to display her accomplishments and basically using her walls as bulletin boards, so we defined her display spaces. We made a specific place to display her gymnastic medals with these hooks from Target. Now they are organized and make a statement on the wall.


I also got her an actual bulletin board for her to pin whatever she wants. She put her calendar in the middle and so far, just a few pictures, but there is room for her to add to it. This way we won’t have post cards pinned in random places.

One other thing we did that you can’t see, is we put some storage bins under the bed. We added things to those bins that we didn’t want to throw away or display. This helped us clean up the space without trashing important memories.
Finally, I completed a pom pom wreath in rainbow colors to compliment our rainbow shelves. We hung that above the bed which is the opposite wall to the shelves. This put the rainbow color theme on two walls and helped balance out the room. Check out Pom Pom Wreath Tutorial here if you are interested in how to make a pom pom wreath.

Before Pictures
Here are our before pictures. As you can see, we did a lot to this room in a short time and it needed it!


Watch Teen Girl Bedroom Reveal here!
Pin Teen Girl Bedroom Reveal here!

Shop this post here!


[…] Teen Girl Bedroom Reveal […]